Why?
Capture high tech peeping-toms:
I would be scared, angry, and slightly flattered.
Other reasons:
Filming by the ever talented Cameraman John: www.johnwillner.com.
Other reasons:
- Entangle your friends!
Inspiration: http://www.instructables.com/id/Build-A-Net-Gun/
Video Overview
Disclaimer
Armchair engineers on forums this blog has been shared to have declared PVC incapable of safely containing 150 psi of pneumatic pressure. I'm not saying this project is entirely safe, but I'm pretty sure properly rated PVC can handle it... Make sure the pipe you use has a rating higher than the pressure you fill it to and make sure you properly glue the joints. The PVC I used is rated to 280 psi (filled to 150 psi):
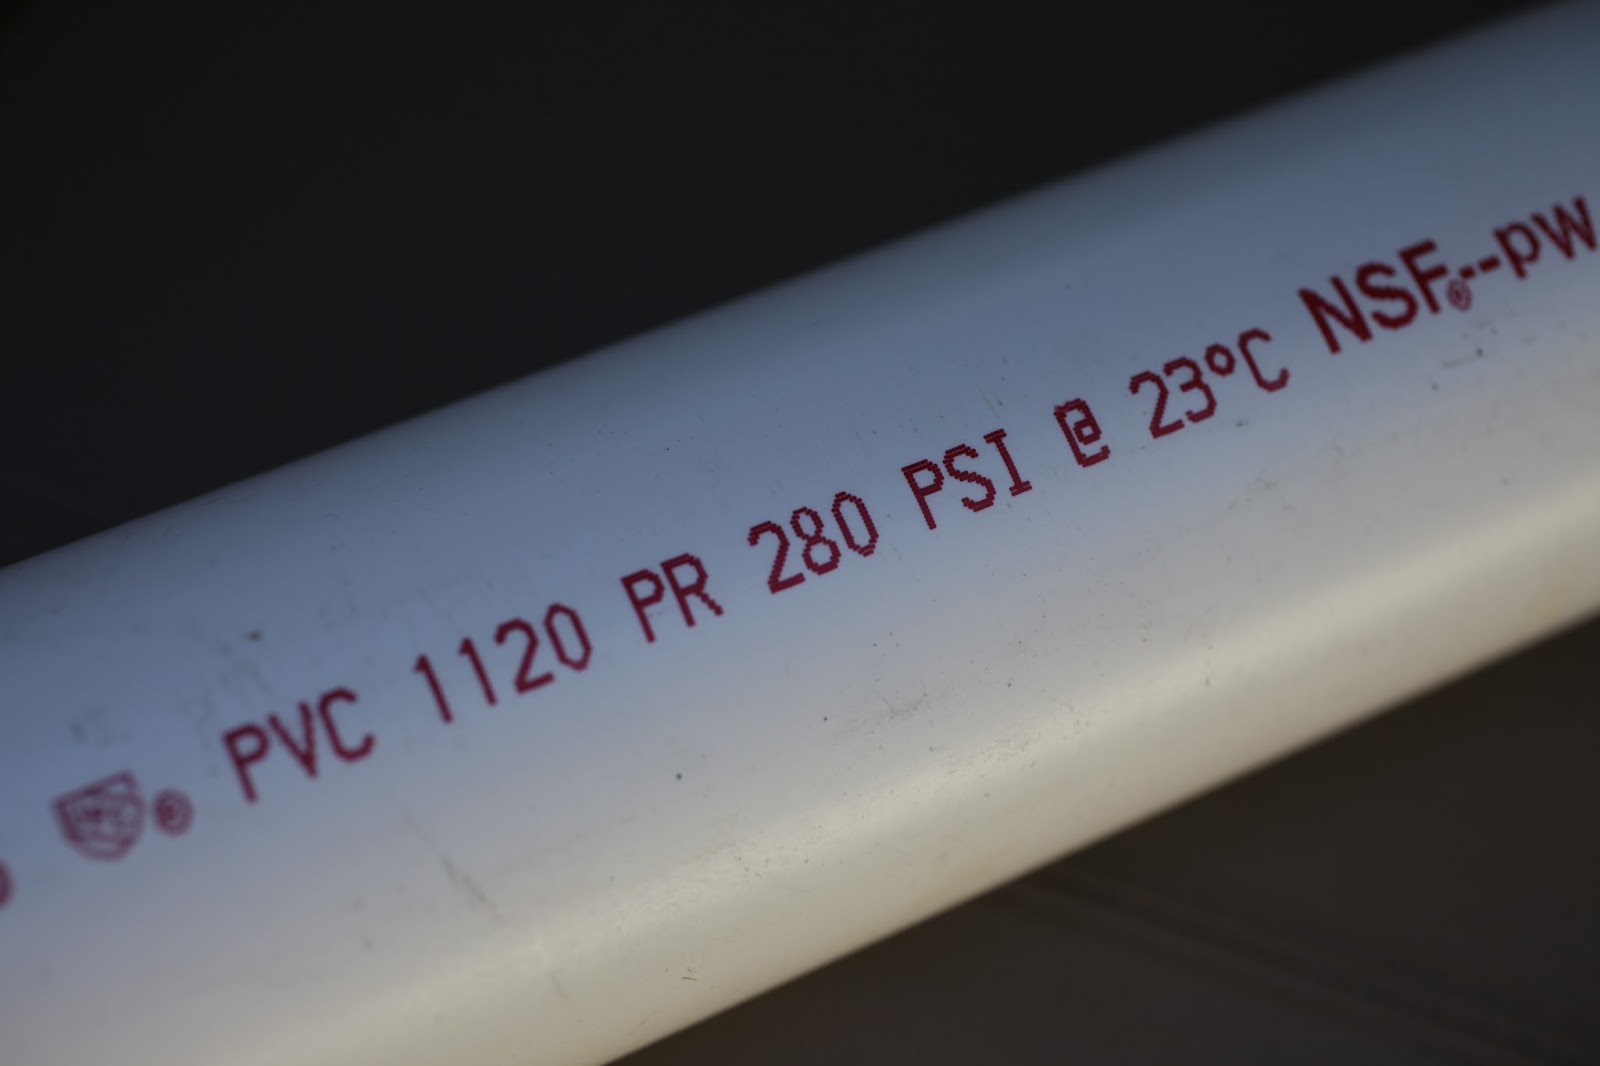 |
| PVC pressure rating |
Now 280 psi only the rating of the pipe, not the pressure it fails at. The manufacturer has tested (hopefully) and declared the pipe capable of continuously withstanding 280 psi at 23 celsius. According to EngineeringToolbox, 2 inch schedule 40 PVC rated to 166 psi bursts at 890 psi.
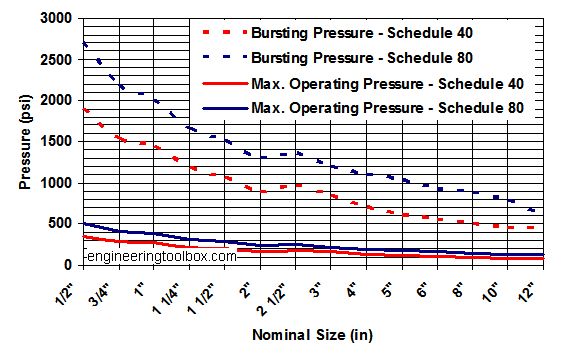 |
| EngineeringToolbox |
These numbers will obviously change in relation to the temperature, condition, and age of the pipe.
Keep in mind that failure of PVC pipe under pneumatic pressure will be much more violent than hydraulic pressure since the air will continue to expand.
YOU SHOULD ALWAYS TAKE SAFETY PRECAUTIONS
- DON'T HOLD THE TANK WHILE FILLING
- Wear safety glasses
- Fill away from people
- Consider wearings gloves
Don't blame me if you blow your hand off.
Here is a video the relative durability of PVC and how spectacularly it fails under the right conditions.
Instructions
No CAD.
No laser.
Finally a project anybody with two hands and at least 7 fingers can do.
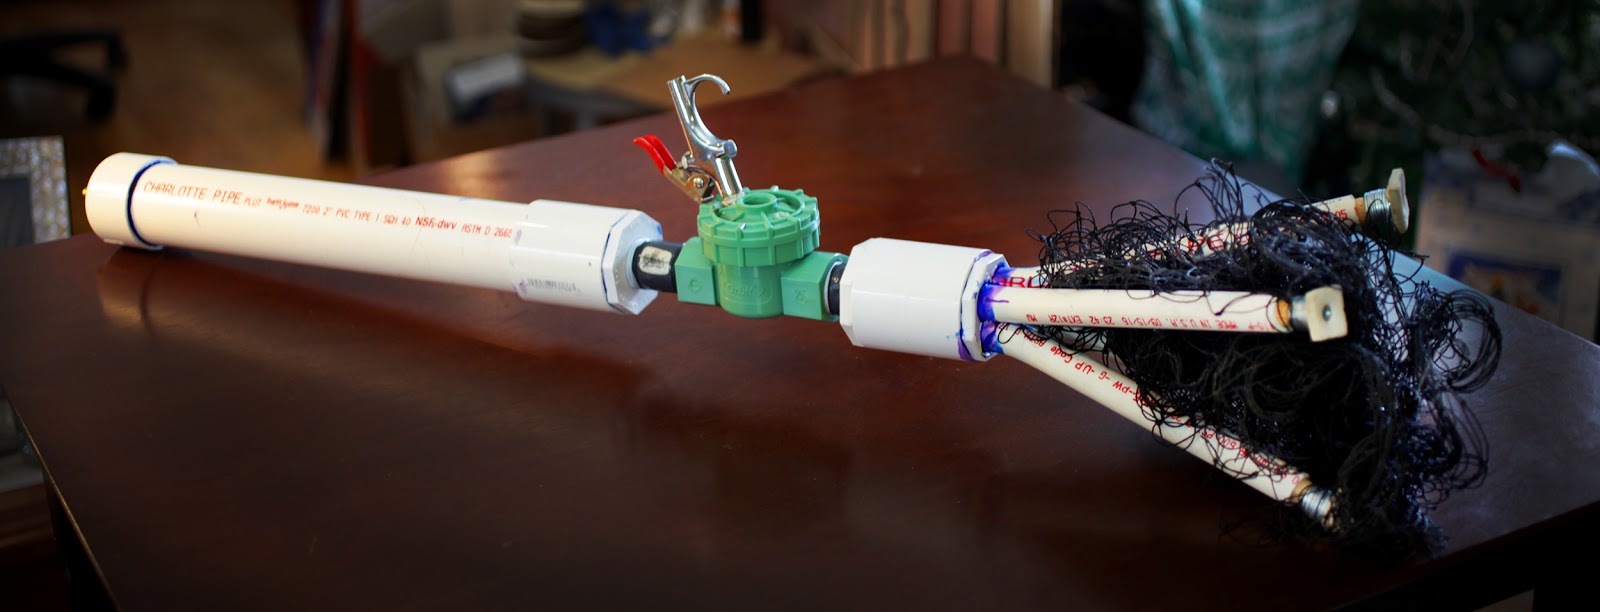
Here's a reference image.
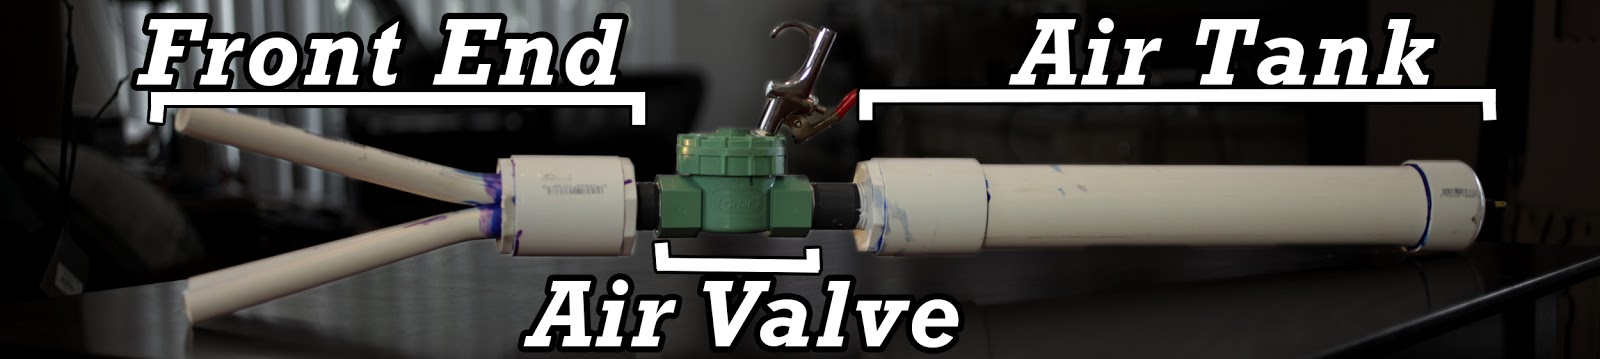
Here's a reference image.
Materials:
- 1x - ~16in length of 2in PVC
- 2x - 2in PVC end caps (I used a flat one from the netgun front)
- 2x - 2in PVC female/female
- 2x - 2in to 1in threaded PVC adapter
- 2x - 1in threaded male/male PVC
- 4x - ~10in 1/2in PVC
- sprinkler valve (Orbit 1in straight)
- air nozzle gun
- tire air valve (autopart store)
- ~2ft wood dowel which fits into 1/2in PVC (may require sanding)
- ~40x - washers (3/16in x 3/4in)
- 4x - wood screws (~2 to 2.5in)
- Foam sheet
- Net (https://www.amazon.com/gp/product/B015BHB98S)
- PVC glue
- teflon tape
Front end:
- Drill 4 holes in one end-cap to fit the four 1/2in PVC barrels (I used a step bit).
- Glue the barrels in. Leave an inch or so of pipe inside the fitting.
- Use a heat gun to soften the PVC barrels, and bend them outward.
- Glue the barrel assembly to a 2in female/female.
- Glue a 2in to 1in reducer to the other end.
- Wrap a layer or two of Teflon tape around the threaded 1in pipe, and screw in.
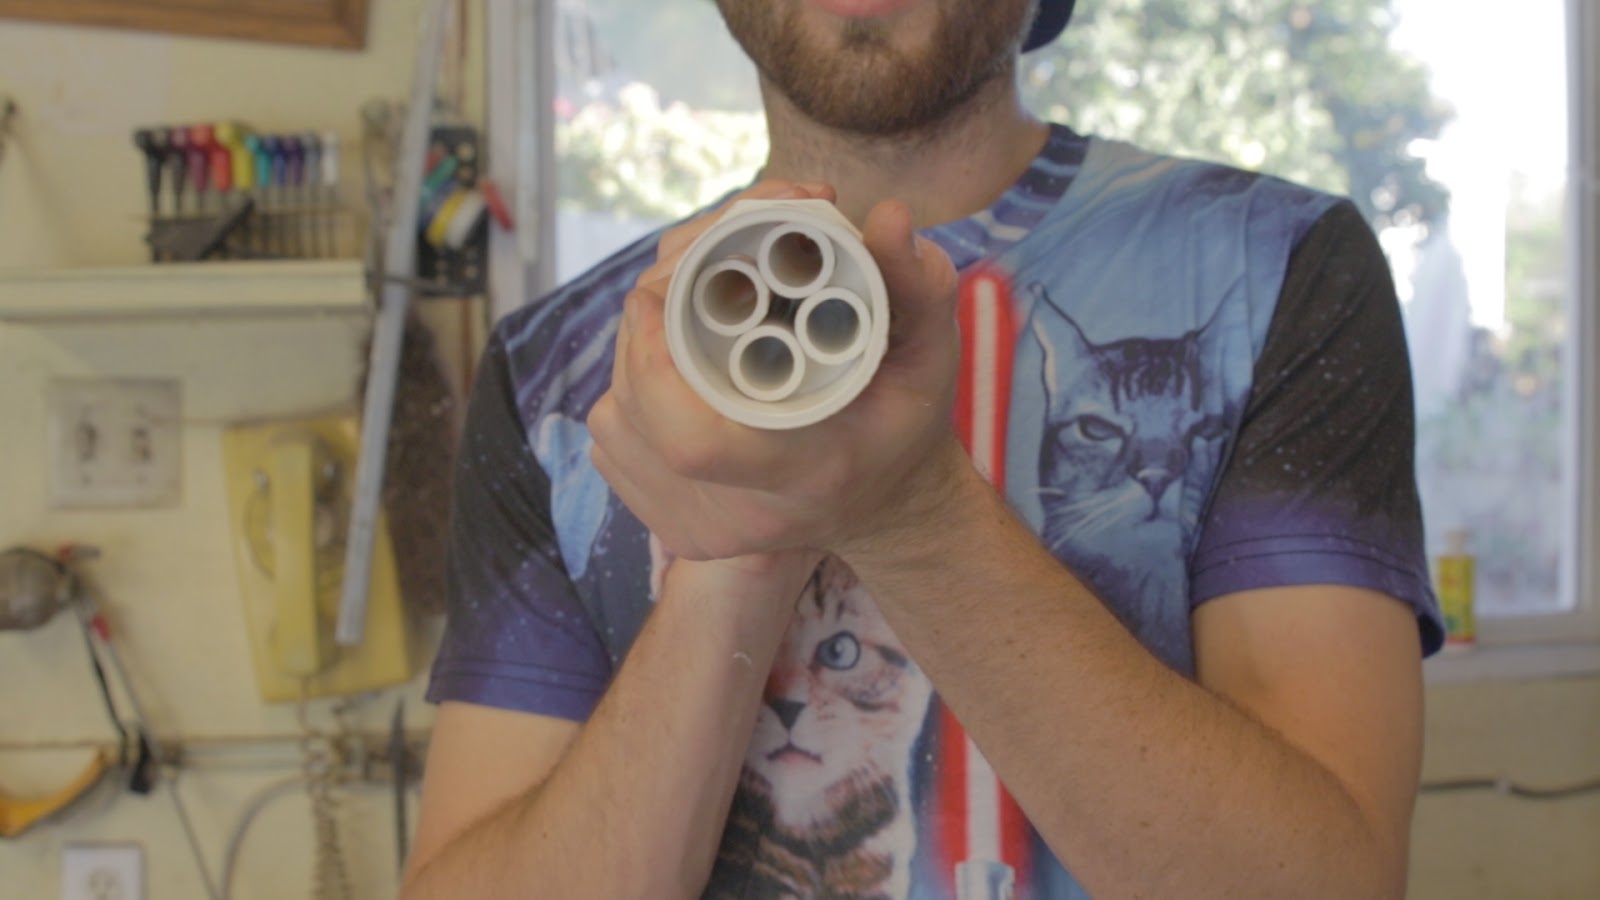 |
| Four barrels |
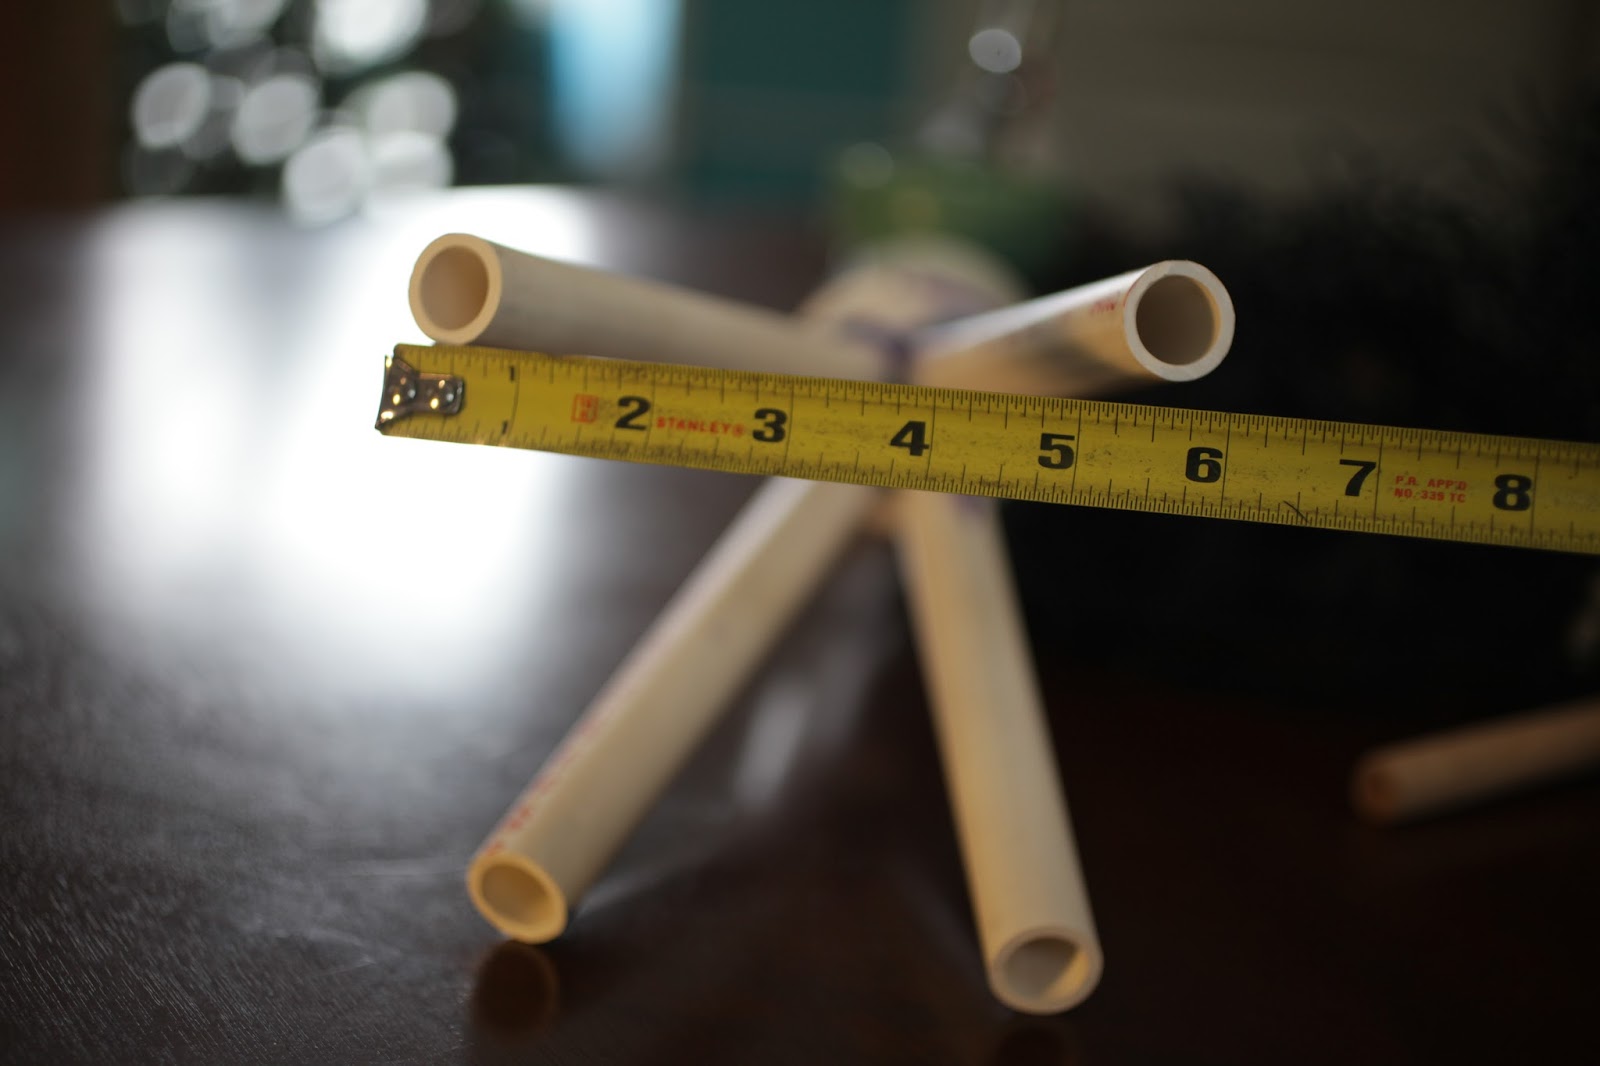 |
| Barrel spread |
Air Tank:
- Drill air valve specified hole diameter in remaining end cap.
- File down/countersink until wall thickness is thin enough for valve
- Pull air valve through the hole until the flange pops through
- Glue end cap to 16in section of 2in.
- Glue other end to 2in female-female.
- Glue 2in to 1in reducer.
- Screw in 1in pipe with Teflon tape.
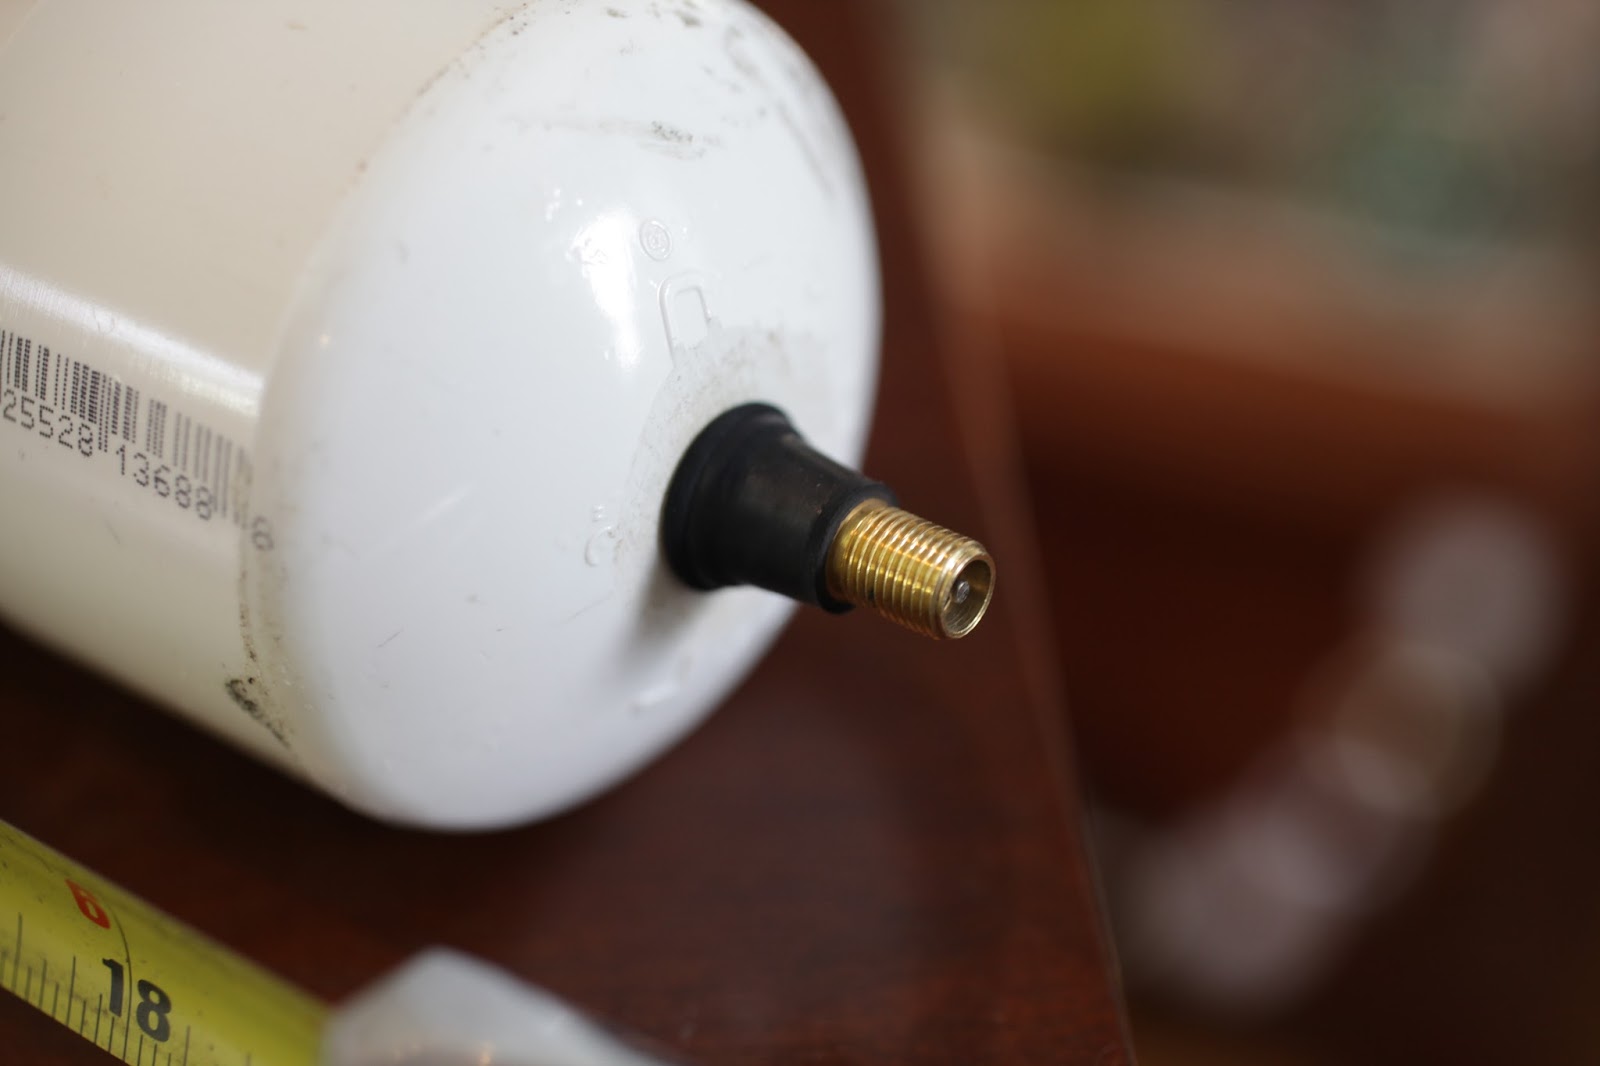 |
| Air valve |
Air Valve:
This modification helps the sprinkler valve open faster.
*If you can fit the air nozzle without removing the solenoid, just leave it on so there's no need for epoxy.*
- *Remove and discard solenoid.*
- *Unscrew the valve and separate both halves.*
- *Fill solenoid vent holes with epoxy.*
- Drill and tap a hole for the air nozzle.
- Reassemble valve, and screw in air nozzle.
 |
| Brass thing is the air nozzle mount |
Net:
The net consists of four weighted plungers and, well, net....
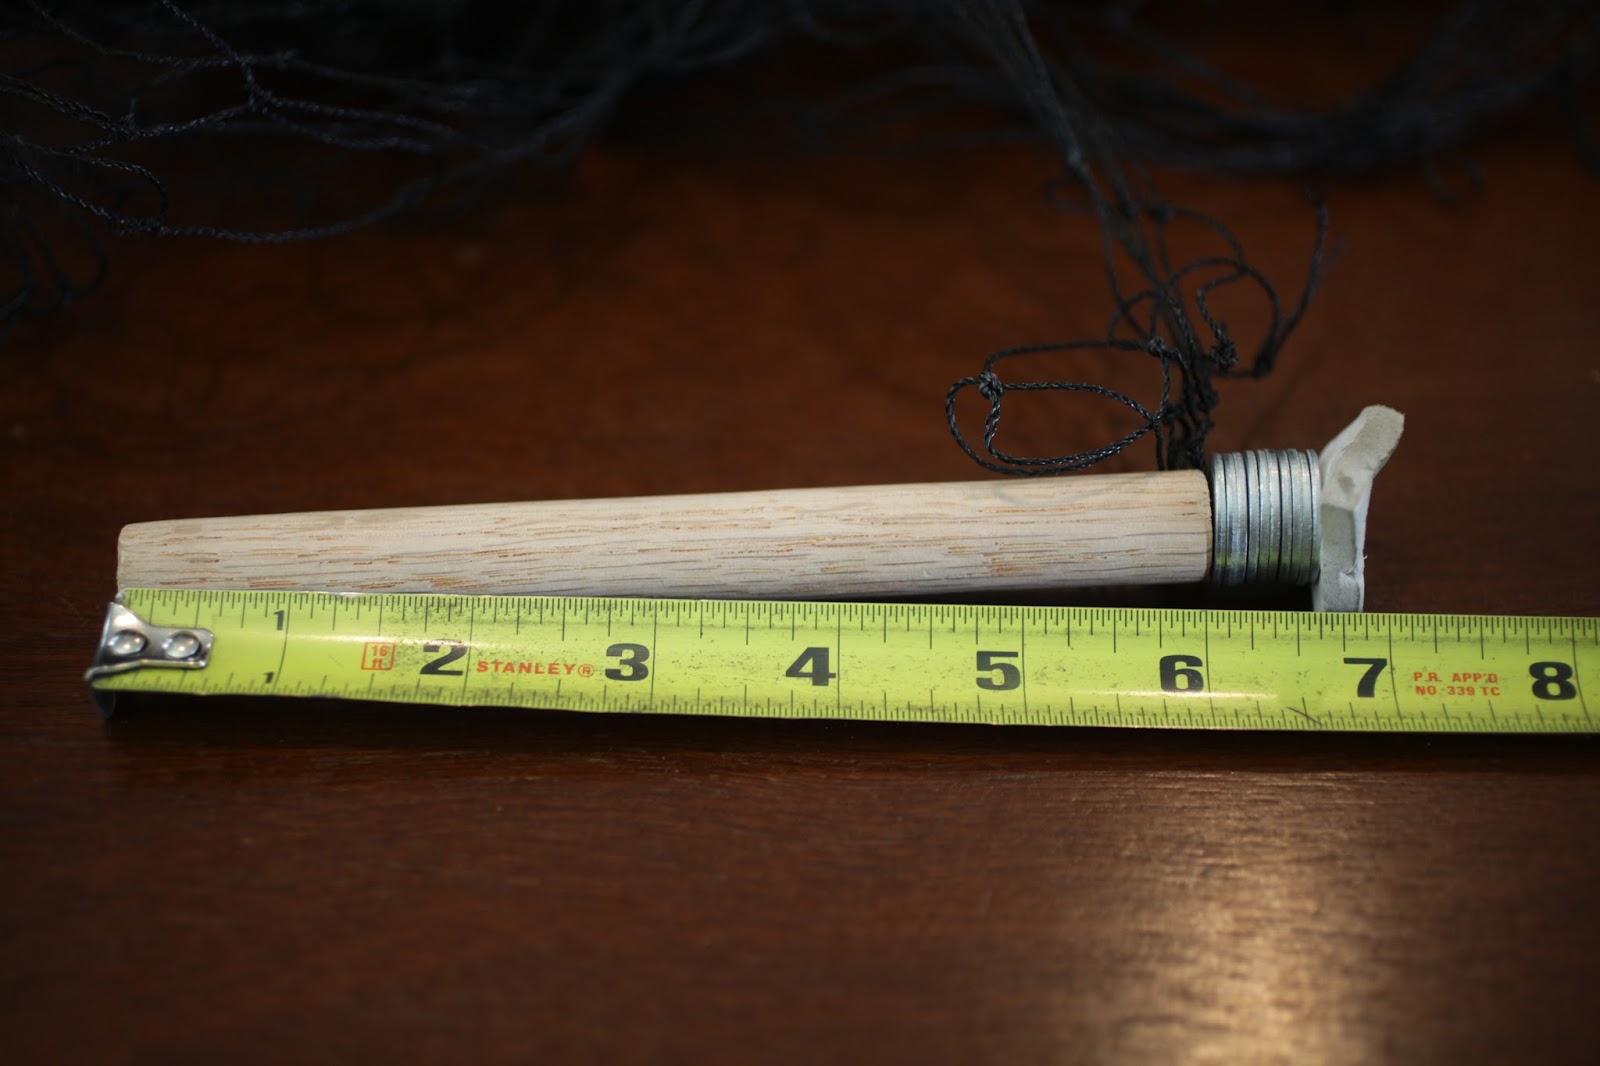 |
| Plunger assembly |
- Cut four 6in pieces of dowel, and sand until they slide into the barrels
- Drill a hole in the top for your wood screw.
- Screw ~10 washers and a foam pad to the dowel.
- Cut a 6x6ft net.
- Attach one weight to each corner by loosening the screw and wrapping the net into the washer sandwich.
Final Assembly:
Screw all three assemblies together.....
Make sure the air valve is oriented in the correct direction (there's a flow arrow). It matters.
Using Your Net Gun
Load the net by bunching it up into a ball. It should be packed in a way where the last part packed is the first part out.
Shove each plunger into a barrel making sure not cross them or the net won't open up when shot.
I fill my air tank to ~150psi. Make sure your pipes are rated for the pressure you use. Don't blame me if it blows up.
Wear safety glasses when filling the tank.
Let the glue fully dry before filling the tank.
Wear safety glasses when filling the tank.
Let the glue fully dry before filling the tank.
Testing
The first successful net fire! I hadn't cut this piece of net very square, so the bottom weights swing in on themselves. The net went about 30'!
 |
| First Test |
I was having some issues with the air valve leaking, so this test didn't go quite as far. It successfully entangles the victim though.
 |
| Third test? |
No more peeping tom!!!!!
 |
| Drone take-down |
The End
I'm out of bits. See ya.
Add a comment