I made a laser cut, Arduino powered, light up, Doctor Strange spell prop. That's a mouthful.
Why?
Because Doctor Strange is a freaking awesome movie.
Video Overview
Filming by: John Willner
Design
This is the style of acrylic edge-light sign I'm shooting for. It's an engraved acrylic sheet with several LED's along one edge.
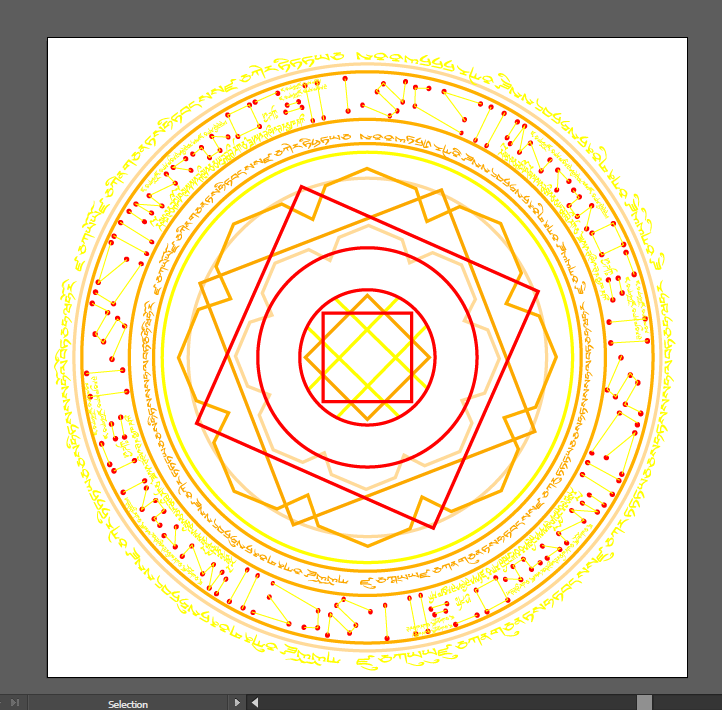
I can't take too much credit for the spell art recreation; it was done by John Willner (aka Camera Man John) in Adobe Illustrator. We started working on it right after seeing the movie.
Here is the vector art:
Here is the reference image used:
Keepin it real, this project was pretty poorly planned. I just started working on the effect I wanted without really knowing how it was going to come together.
This is what I had in my head:
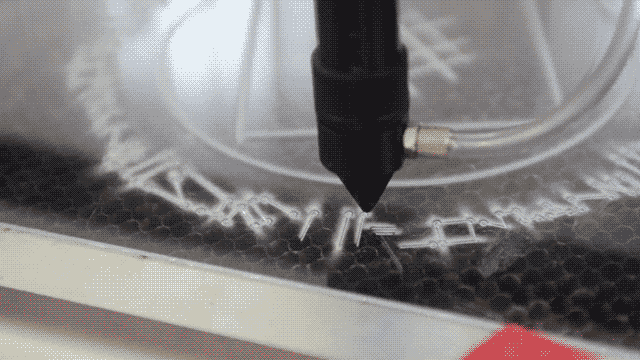
The first step was marking/cutting the design on my laser.
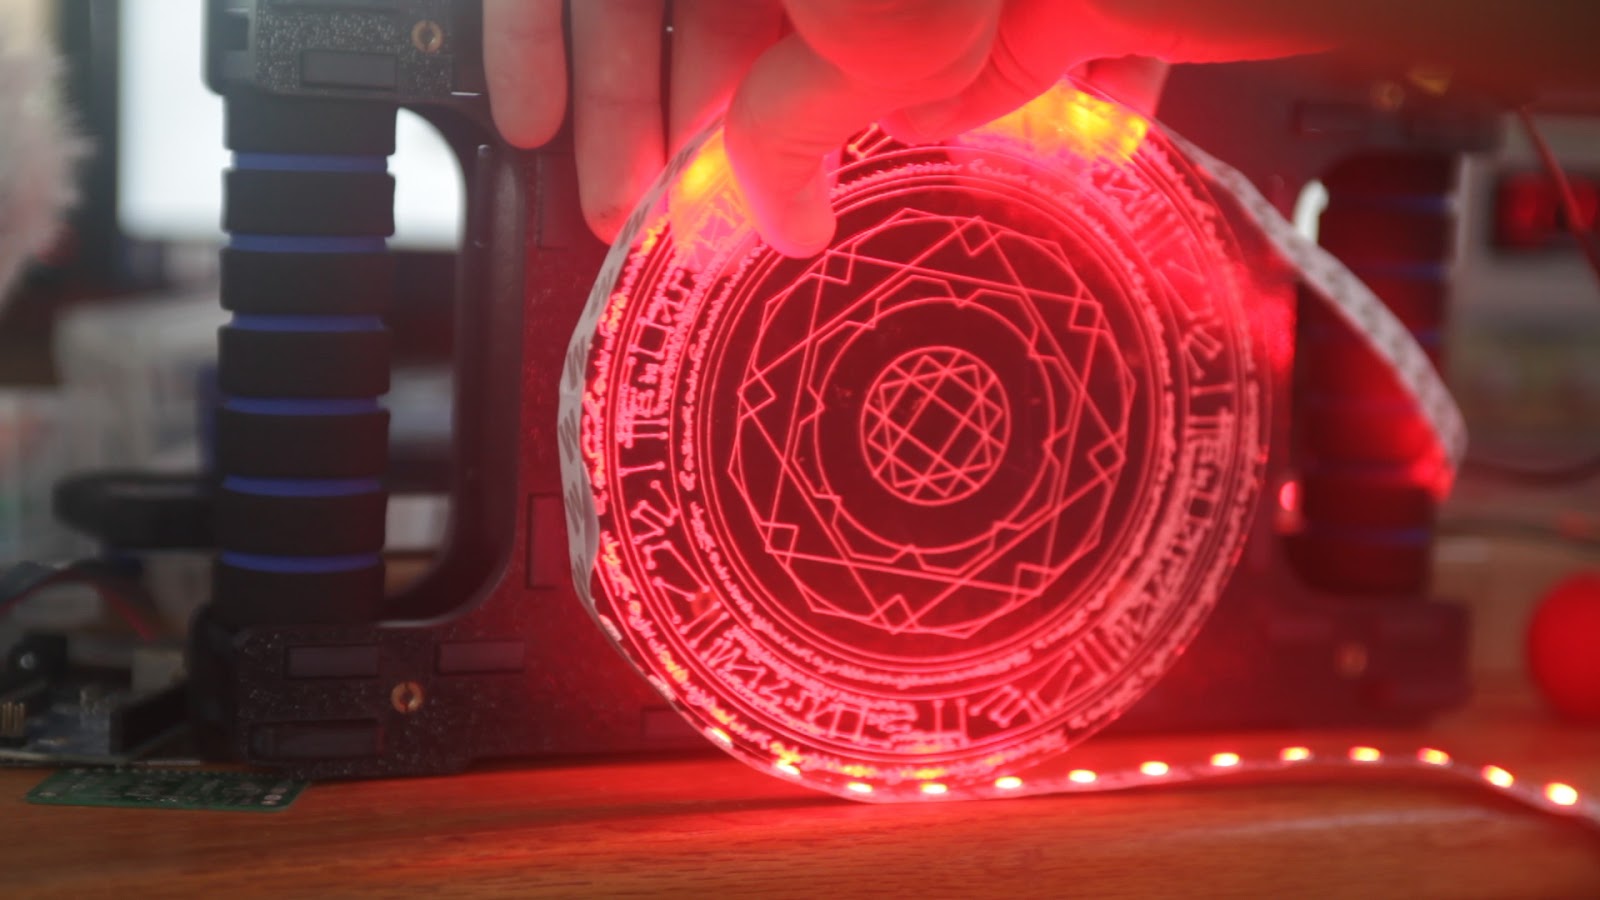
Then tested how well it glowed.
A phenomenon called "total internal reflection" allows this glowing to happen. Like fiber-optics, light enters the acrylic from one end and bounces off the internal faces until it exits the other end. This is commonly called a "light pipe".
Wait....
It's more like this effect wouldn't work without total internal reflection. It's the non-reflective surfaces which allow light to escape, and the reflective surfaces which prevent light from escaping. This escaping light is what you see as a glow. The laser cutter is used to selectively destroy the reflective surface.
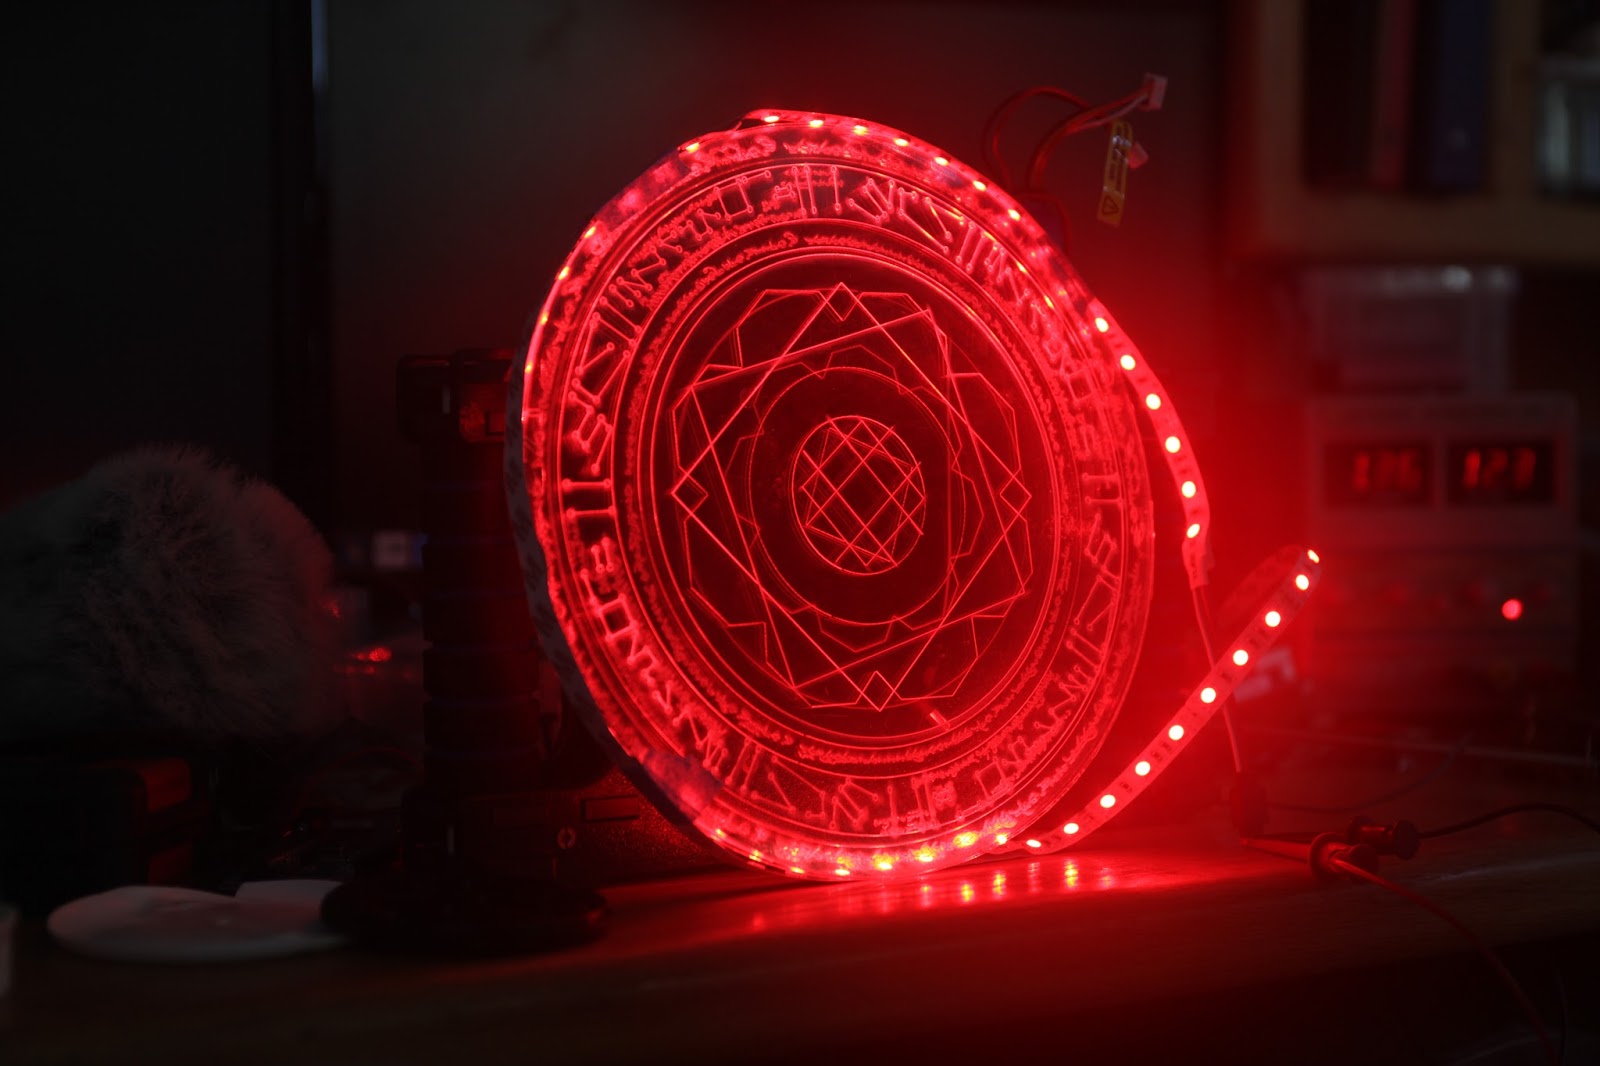
I wasn't really satisfied with the brightness of the design. All of the signs I was finding online look super bright compared to my results.
After taking a few pictures of the test spell in the dark, I realized that these signs don't work well when it's not dark. Every single image I found online is taken in an extremely dark room.
I tried cutting with different variations of speed, power, and focus, but nothing looked better than the first one. The laser tends to leave a polished surface which.... well... total internal reflection... A mill would probably do a much better job of roughing the surface up. Sandblasting works with a protective mask, but then you need to remove a hundred protective mask slivers at the end.
To try and match the dynamic-ness of the movie spells, I broke the design into three layers, and cut the disks full size.
An Arduino will be used to animate the brightness of each layer individually.
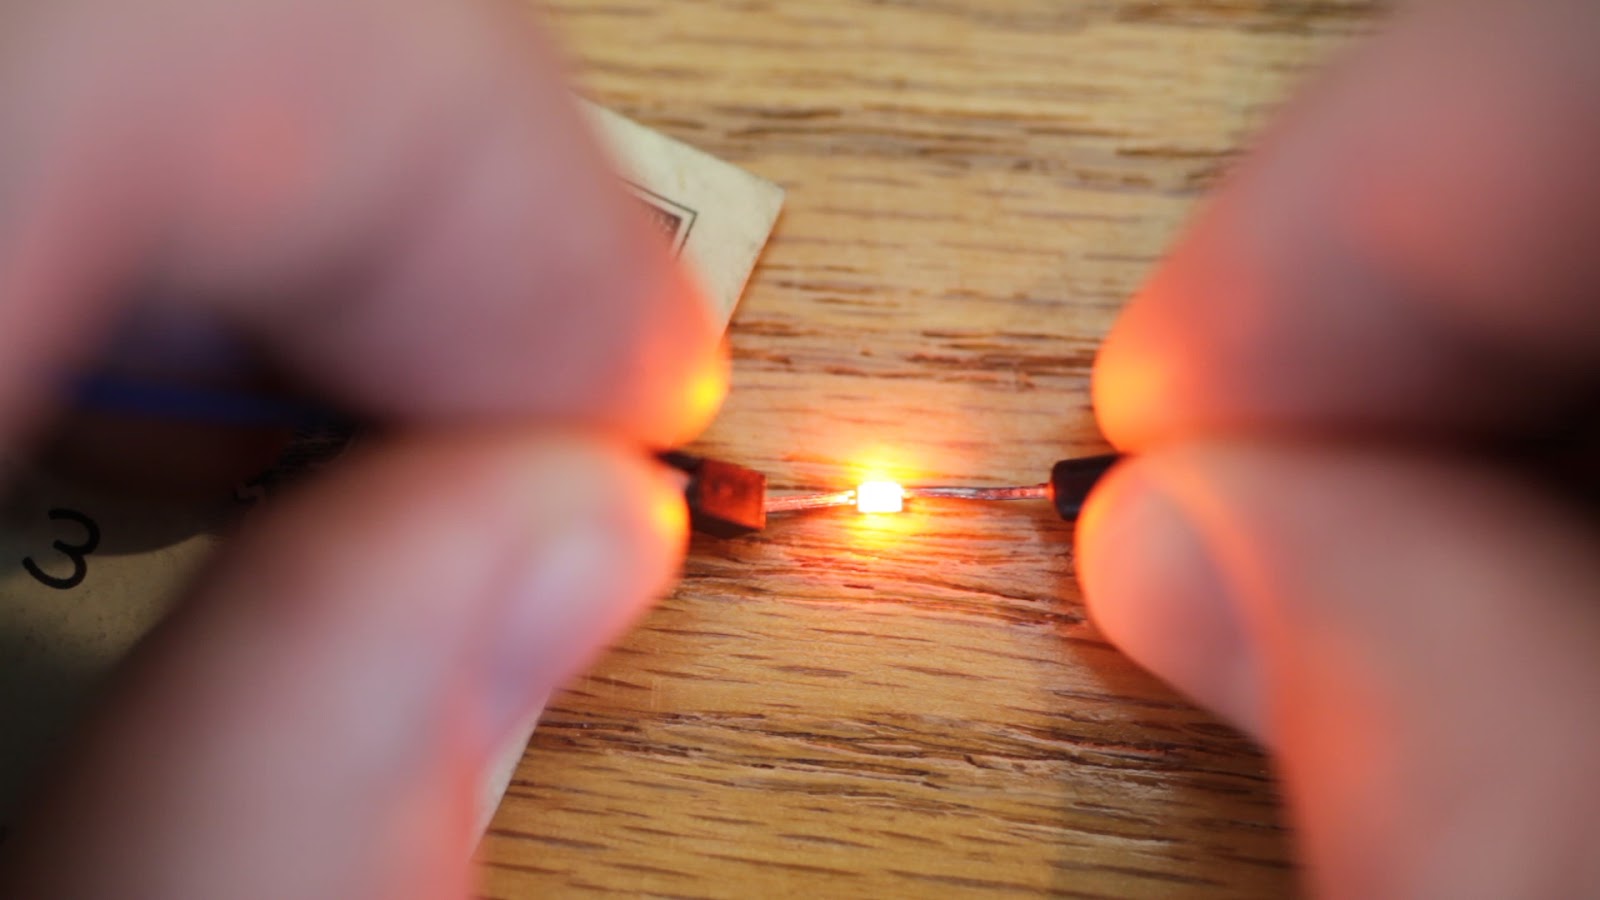
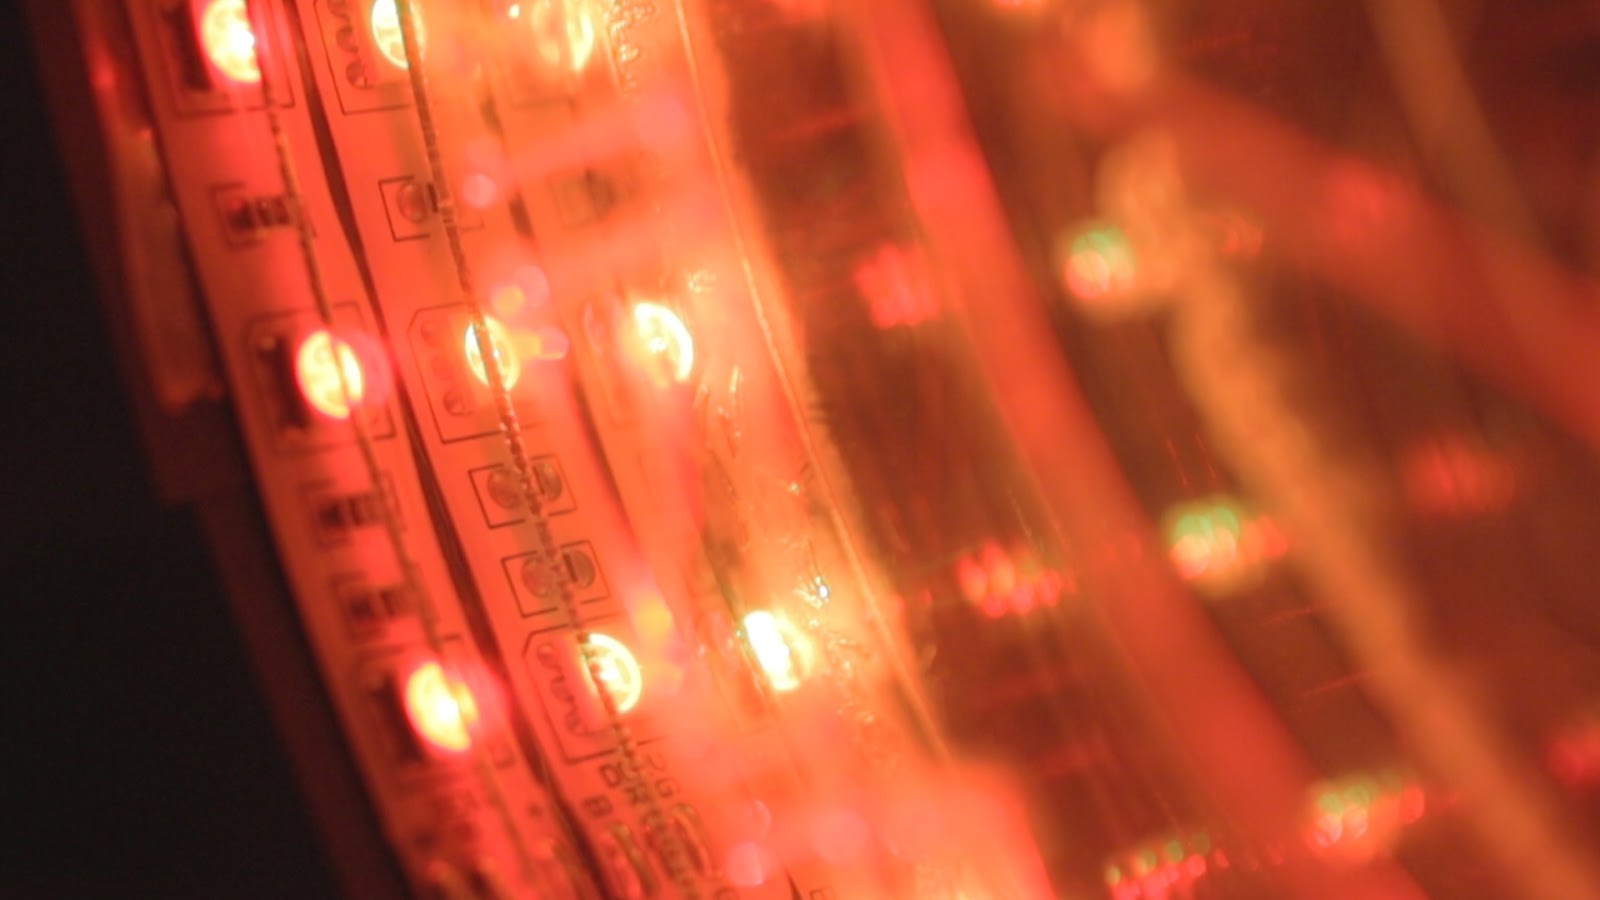
The RGB LED strip is too wide to keep light from bleeding into the other disks, so I order 100 orange surface mount LEDs from DigiKey. These LEDs are small enough to fit on the edge of each acrylic disk without bleeding into the others.
Nowwww, turns out I changed my mind at some point and decided to space the disks about 0.25 inches apart to give some depth. This meant I could use the RGB strip instead of soldering 54 LEDs together. This is the strand I made right before I decided I didn't have to make any more strands.
Right about here is where my lack of planning pokes its head out.
I have no idea how the disks are going hold to each other, and how that assembly is held by me.
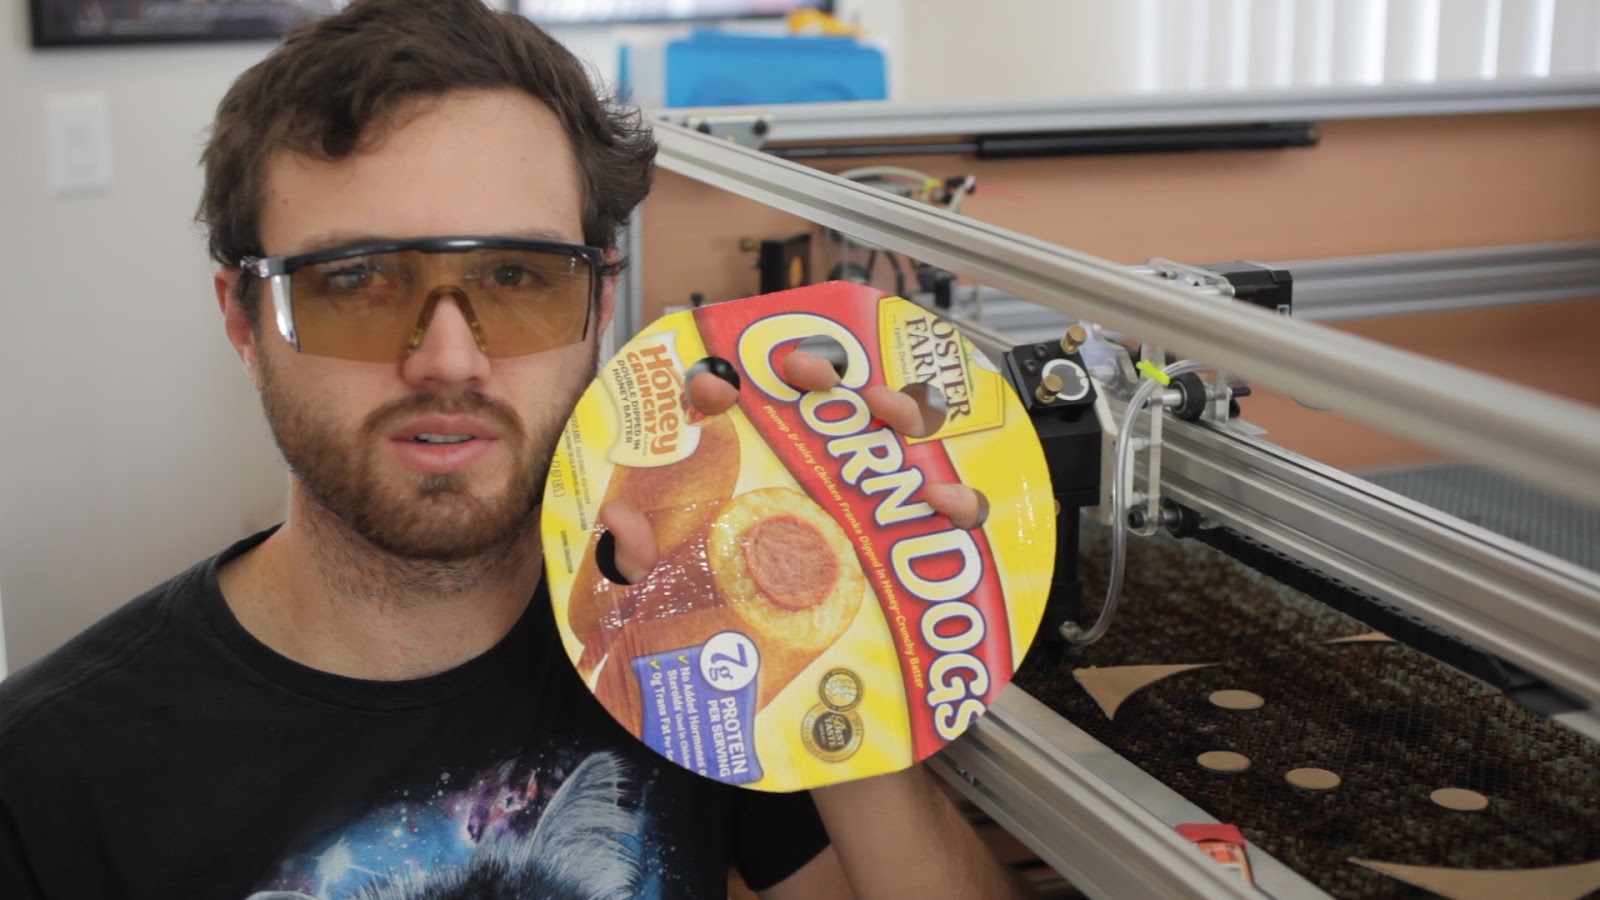
A corn dog box was used to test a bowling-ball idea.
Yeah, that works.
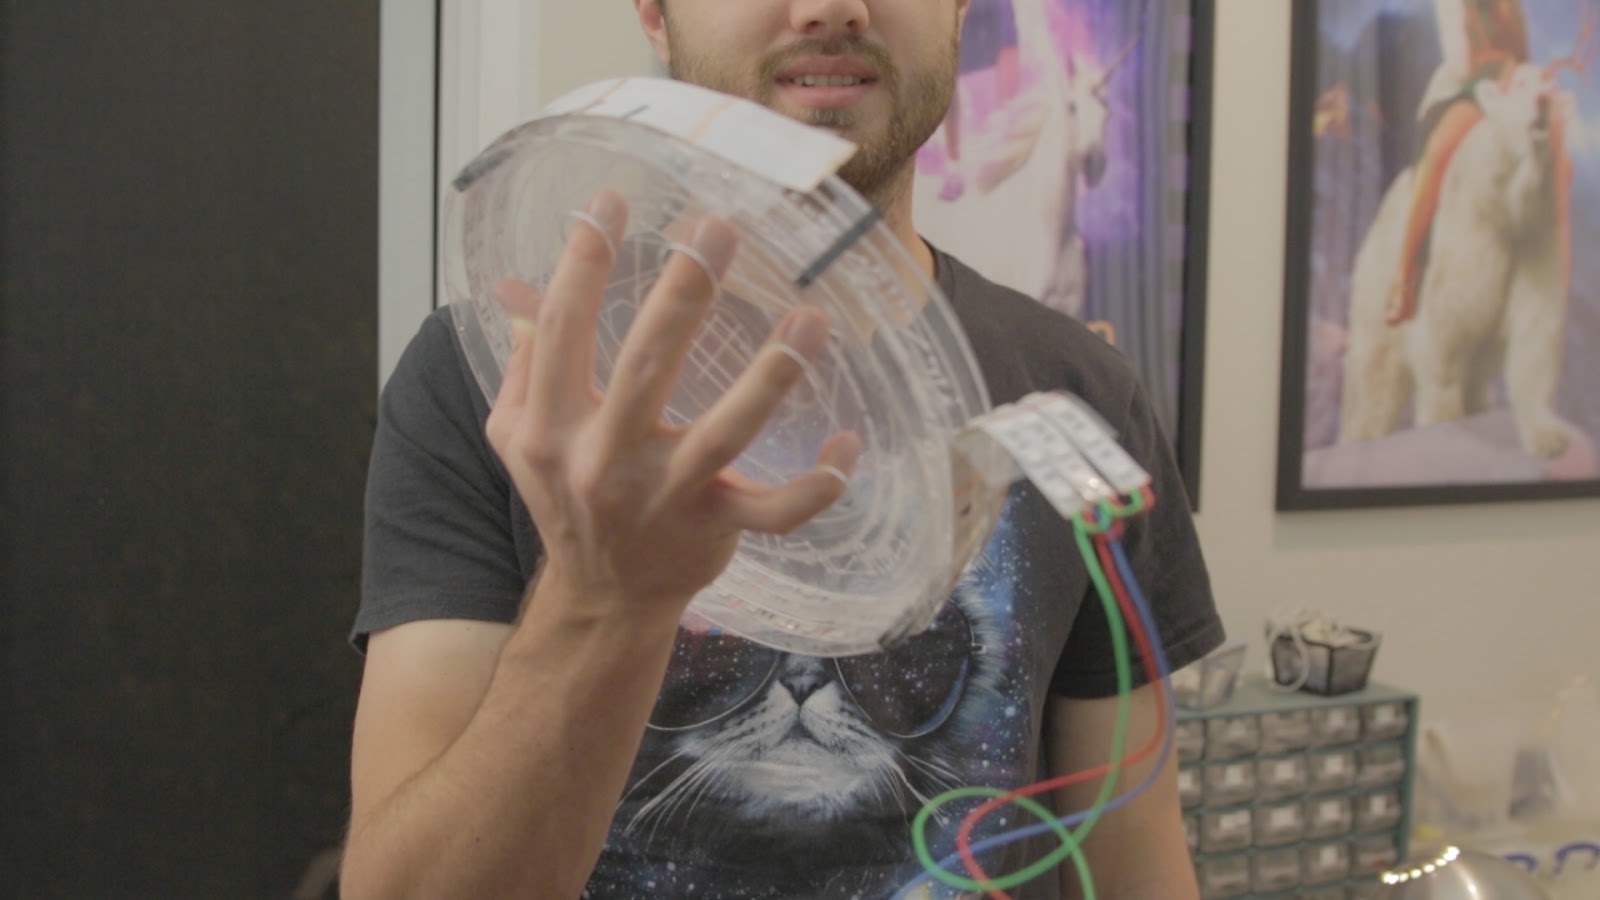
Then, like a boss, I used clear packing tape to secure the disks, finger mount, disk spaces, and LED strips together.
Putting this together was like trying to set a shoddy mousetrap; one slip-up and the whole thing explodes cutting your fingers off. The packing tape keeps everything together well enough.
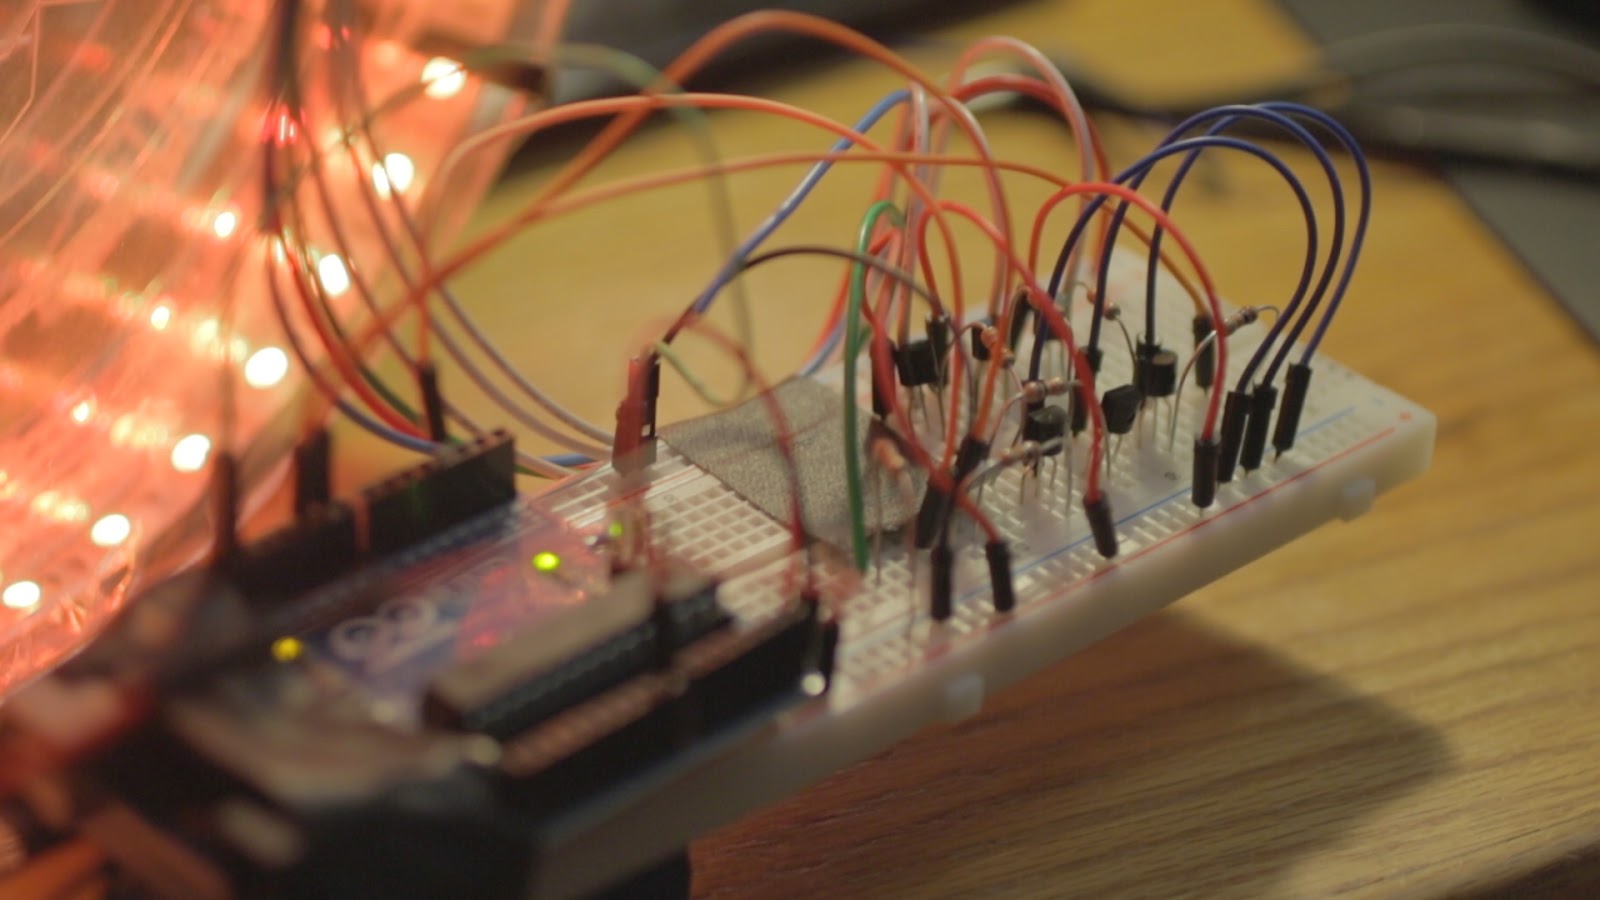
The theme of the project seems to be using tape where you wouldn't normally use tape, so I threw some tape to hold all of the electronics together.
A 3 cell lipo battery powers everything.
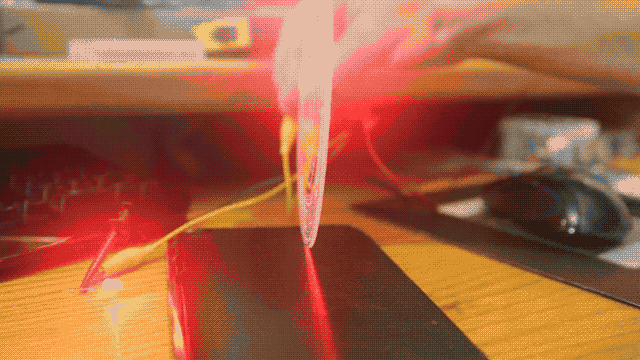
A short Arduino sketch uses some sine waves and random values to create flickering which isn't too violent.
 |
| Why? |
Here is the vector art:
 |
| John made this |
Here is the reference image used:
 |
| Benedict Cucumber Snack |
Keepin it real, this project was pretty poorly planned. I just started working on the effect I wanted without really knowing how it was going to come together.
This is what I had in my head:
 |
| Real Magic |
 |
| Laser Cutting |
 |
| Glow Test |
 |
| Total Internal Reflection |
It's more like this effect wouldn't work without total internal reflection. It's the non-reflective surfaces which allow light to escape, and the reflective surfaces which prevent light from escaping. This escaping light is what you see as a glow. The laser cutter is used to selectively destroy the reflective surface.
I wasn't really satisfied with the brightness of the design. All of the signs I was finding online look super bright compared to my results.
 |
| I wish this game didn't suck |
I tried cutting with different variations of speed, power, and focus, but nothing looked better than the first one. The laser tends to leave a polished surface which.... well... total internal reflection... A mill would probably do a much better job of roughing the surface up. Sandblasting works with a protective mask, but then you need to remove a hundred protective mask slivers at the end.
To try and match the dynamic-ness of the movie spells, I broke the design into three layers, and cut the disks full size.
 |
| Looks pretty good in the dark |
The RGB LED strip is too wide to keep light from bleeding into the other disks, so I order 100 orange surface mount LEDs from DigiKey. These LEDs are small enough to fit on the edge of each acrylic disk without bleeding into the others.
 |
| Tiny orange LED |
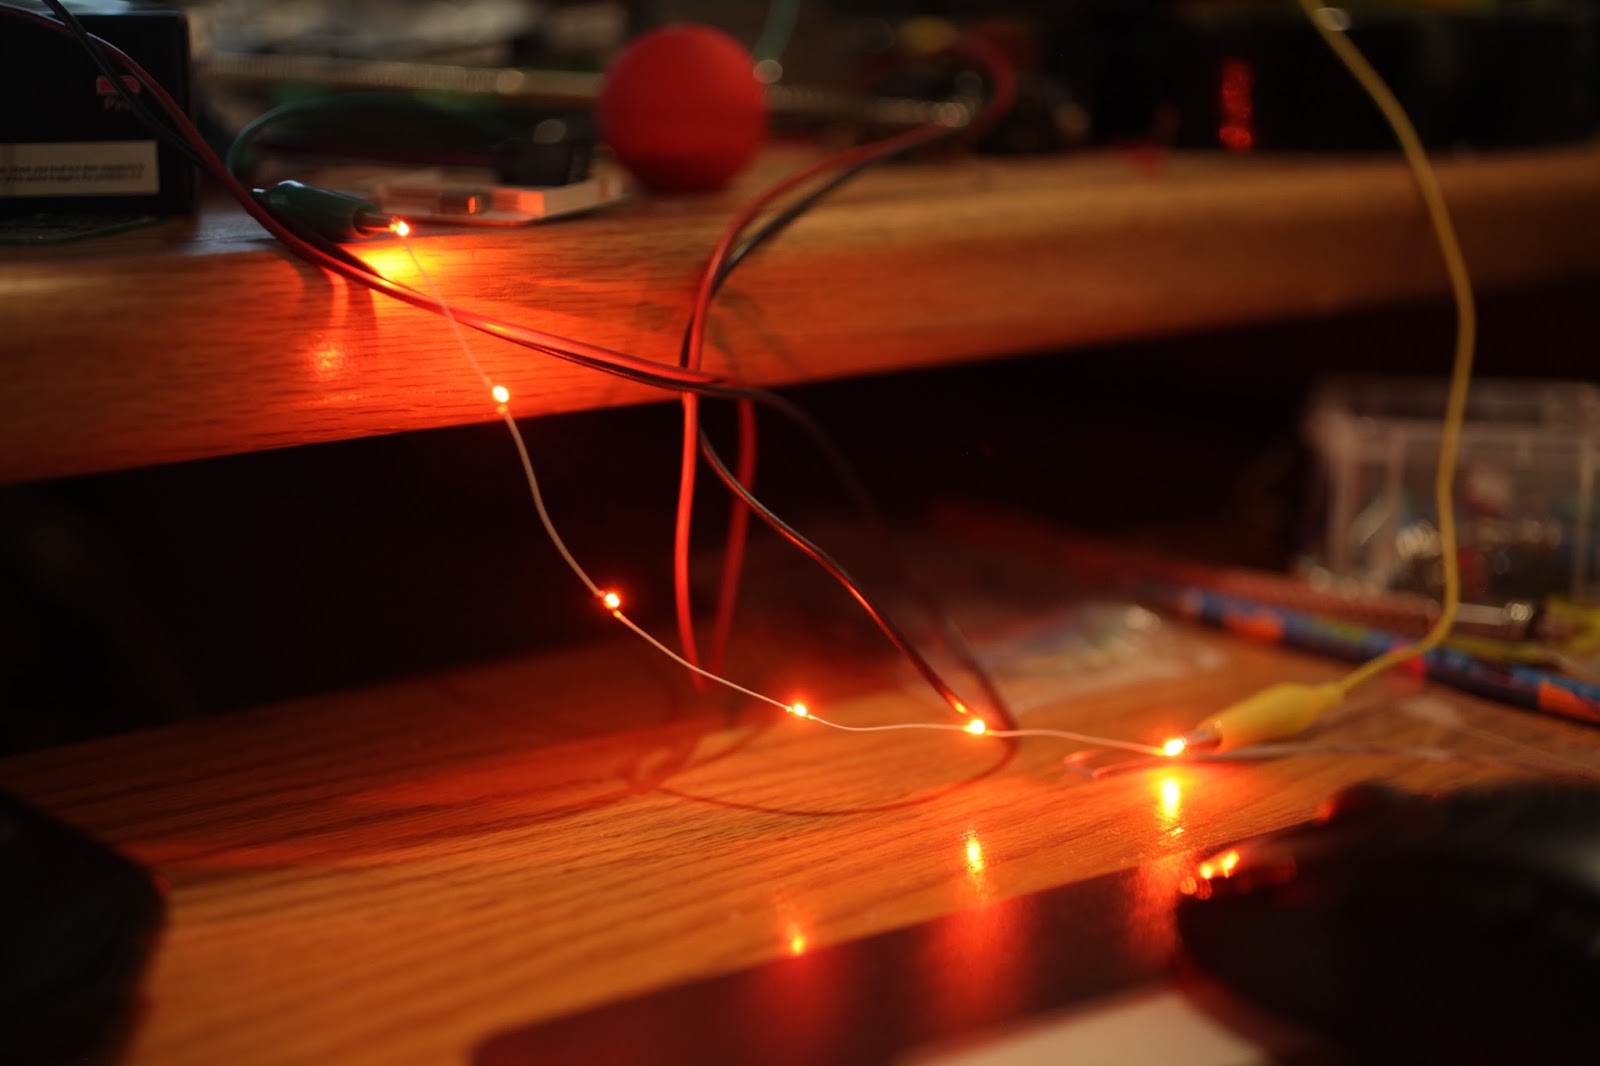 |
| Scrapped LED strand |
I have no idea how the disks are going hold to each other, and how that assembly is held by me.
A corn dog box was used to test a bowling-ball idea.
 |
| Bowling ball technique |
Then, like a boss, I used clear packing tape to secure the disks, finger mount, disk spaces, and LED strips together.
 |
| Rough Assembly |
Electronics
Each disk has a common 12v rail. High side drivers control the total brightness of each disk individually. The color is set for all the disks by grounding the red channel for full brightness and an inline 330 ohm resistor to dim the green channel. The blue channel wasn't used at all.The theme of the project seems to be using tape where you wouldn't normally use tape, so I threw some tape to hold all of the electronics together.
A 3 cell lipo battery powers everything.
 |
| Electronicals |
|
| Flicker Demo |
Conclusion
I really do think anything other than a laser would create a better surface finish for a brighter glow. I don't know...
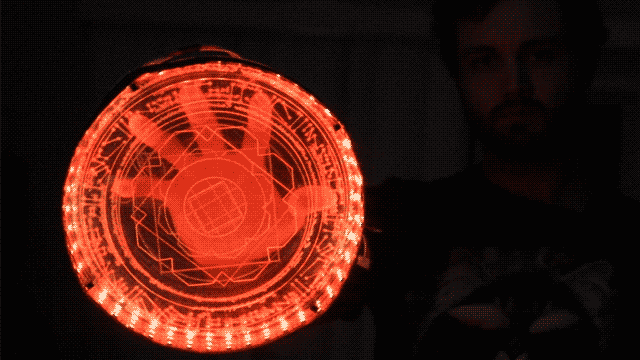
Also, having my hand right behind the disks really ruins the contrast with a dark background. The glowing hand definitely looks cool, but it doesn't really match the movie effects.
There won't be a next time, but maybe next time I could try to mask the LEDs better so they aren't so visible around the edges.
Another issue was the LED's didn't want to stay on the acrylic edge. They kept popping off to the sides.
Another issue was the LED's didn't want to stay on the acrylic edge. They kept popping off to the sides.
 |
| Edge Lights |
The End
That's it.
dig the attempt and effort - great work!
ReplyDeleteThank you!
DeleteI've been tempted to do similar with a motorcycle windscreen. Maybe now I will. Thanks.
ReplyDeleteWait, can I find the vector file somewhere? I have ideas....
ReplyDelete